Dec 15, 2015

Christmas Gifts for The Outdoorsman

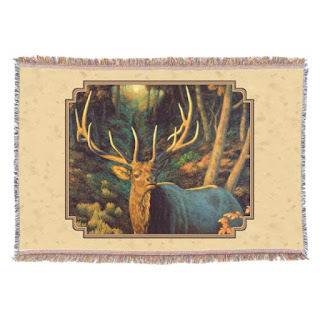
Are deer and ducks their thing? I have lots of prints and products featuring whitetail deer, mule deer, elk, and mallard ducks that would make great holiday gifts for the outdoor sportsman or sportswoman you know.

Prints are available on Fine Art Archival paper, acrylic, metal, and canvas and can be purchased framed or unframed.

http://pixels.com/profiles/crista-forest/shop/all/all/all/paintings+deer
Check out the deer, elk, and moose prints gallery here.

http://pixels.com/featured/golden-pond-crista-forest.html
See all the mallard duck print sizes and options here.

Lots more products featuring ducks and deer in my Zazzle Store. Here are a few examples of some of the cool gift ideas.

http://www.zazzle.com/forestwildlifeart/gifts?cg=196987668299908586
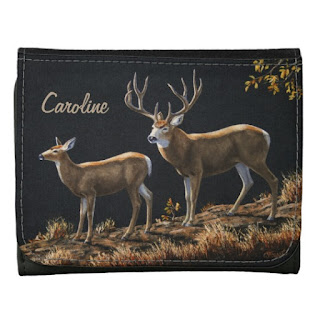
 Look for other animal art wallets here.
See more mule deer products here.

http://www.zazzle.com/forestwildlifeart/gifts?cg=196949845454126216
Check out more wildlife phone cases here.
See more whitetail deer products here.


http://www.zazzle.com/forestwildlifeart/gifts?sr=250830533232041725&cg=196188440445485718&pg=1&sd=desc&st=date_created
See more animal throw blankets here.
See more elk products here.

http://www.zazzle.com/forestwildlifeart/gifts?sr=250830533232041725&ch=forestwildlifeart&cg=196240577607424258
See more wildlife neck ties here.
See more mallard duck products here.


Dec 14, 2015

Christmas Gifts for Bird Lovers

There's still time to order holiday gifts for the bird lover you know. Don't buy mass produced products at the big box stores. Give something unique. I have hundreds of products featuring bird art that you won't find anywhere else. Many of these products are customizable, too, so you can personalize them with the recipient's name, or write your own special message.

Hundreds of products to choose from for every kind of gift giving. From coffee mugs to cuff links, from wallets to watches, there's something for everyone. Here are just a few sample items available.

http://www.zazzle.com/forestwildlifeart/electronics?dp=252373910128475557&cg=196177530377949599

See more hummingbird products here.
See more bird phone cases here


http://www.zazzle.com/forestwildlifeart/fleece+blankets?dp=252789377577866827&cg=196177530377949599

See more bluebird products here.
See more bird fleece blankets here.
http://www.zazzle.com/forestwildlifeart/doormats?dp=252650349037849512&cg=196177530377949599
See more chickadee products here.
See more bird doormats here.
 http://www.zazzle.com/forestwildlifeart/pillows?dp=252580206566356873&cg=196177530377949599

See more autumn birds products here.
See more bird pillows here.


Visit my Zazzle Store to get more gift ideas for bird lovers.

Dec 12, 2015

Christmas Gifts for Horse Lovers

It's not too late to order custom horse art products for the horse lover you know and get them in time for Christmas!

I've added hundreds of new horse art products to my Zazzle Store and Pixels. Between the two sites there is something for everyone, from greeting cards to canvas prints, from throw blankets to throw pillows, iPad covers and phone cases, gift wrapping supplies, coffee mugs to cutting boards, and hundreds more household products, apparel, and electronics accessories.

Here are a few samples.

http://www.zazzle.com/forestwildlifeart/pillows?dp=252580206566356873&cg=196638235158159770

See more horse art pillows here.


http://www.zazzle.com/forestwildlifeart/bags?dp=252483252952235992&cg=196638235158159770&st=date_created 
 See more horse art bags and backpacks here.


http://www.zazzle.com/forestwildlifeart/electronics?dp=252373910128475557&cg=196638235158159770&st=date_created
 See more horse electronics accessories here.

http://www.zazzle.com/forestwildlifeart/clothing?dp=252657725253948300&cg=196638235158159770

See more horse art apparel here.

Dec 4, 2015

Digital Deer and Maple Tree Painting - Finished!

I actually finished this painting about a week ago with some recent health issues I wasn't feeling much like blogging. But I'm feeling better now, so I should be back to blogging more often.

So here's the completed painting.

http://pixels.com/featured/whitetail-deer-hilltop-retreat-crista-forest.html

This digital image is huge at 80"x80". The nice thing about digital painting vs real oil painting is that size doesn't matter as far as completion time. An 80"x80" physical canvas would take me months to fill. But on the computer screen an 80"x80" doesn't take any longer to complete than a 20"x20". This is a big advantage in that I can use this image on very large items, such as this shower curtain, and it will still look good. Even close up the image will be crisp and detailed.

http://pixels.com/products/whitetail-deer-hilltop-retreat-crista-forest-shower-curtain.html
 Click here to purchase a shower curtain.


I've already added this image to a lot of products. Besides the shower curtain above, I've added it to all the products available from Pixels.com including the usual art prints, throw pillows, tote bags, t-shirts, and duvet covers. A few items are shown here.

http://pixels.com/products/whitetail-deer-hilltop-retreat-crista-forest-throw-pillow-14-14.html


http://pixels.com/products/whitetail-deer-hilltop-retreat-crista-forest-tote-bag-18-18.html


http://pixels.com/products/whitetail-deer-hilltop-retreat-crista-forest-adult-tshirt.html


There are lots of other size, style, and color options for the shirts. The other products also have several size options to choose from.

As usual, in addition to those items above from Pixels.com, I have many more items available featuring this image in my Zazzle Store.

Nov 10, 2015

Digital Deer and Maple Tree Painting - WIP7

So, I spent the past week working in ArtRage doing the background, trees, and leaves. With the leaves all in place it's now easier for me to switch back to Photoshop to add the leaf shadows. I could paint them in ArtRage (or Photoshop) one shadow at a time. But the thing I don't like about painting shadows on top of existing leaves is you lose that detail continuation between shadow and light. The veins and texture on the leaves, for example, you want to continue from dark to light unbroken. If you repaint the dark areas those veins and textures tend to not line up quite right anymore and you get a separated look. In traditional oil painting you might just go back and give some areas a darker wash if you want to darken them without obscuring the existing detail. So this is sort of what I'm going to do in Photoshop.

So here's a version of the painting before I apply my "shadow wash" to the leaves and tree.


Now in this next image (besides adding more leaves to the ground) I've added shadows to the leaves, tree trunk, and branches.


To do this I kept my leaves on separate layer when bringing the image in from ArtRage to Photoshop. I used that leaf layer to create a selection. Then I created a new layer to paint my shadows on. The selection created by the leaves keeps my shadows only on the leaves so I don't have to worry about painting out of lines and having bits of shadow on the sky and elsewhere.

Before painting my shadows, however, I have to do a couple of things. I set the layer's blending mode to Multiply and adjust its opacity to about 65%. This ensures the detail in the leaves are not obscured by the color I'm about to apply.

Next I pick a medium warm gray. I want a fairly neutral gray so I don't tint the leaf colors too far from their original colors. Normally shadows are a cooler gray. But because leaves are semi-translucent some of their color will come through in the shadows. So, with all this orange and red in the leaves, I want to keep the shadows on the warm side here.

Next, I pick a soft brush and start painting here and there on the leaves that obviously are shadowed by nearby leaves. Then I go back and dab a few shadows on leaves necessarily look to be shadowed by a nearby leaf. There are a lot of other branches and leaves higher up in the tree and any leaf can have shadows cast from near or far.

Next I repeat the whole process to dab some shadows on the trees' trunks and branches. Here's a closeup detail of some leaf shadows. You can see the original detail remains here. It's now just a bit darker.


One thing to keep in mind when doing this. Don't precisely copy the shape of the above leaf in the shadow below. Just make rough approximations. Leaves are at varying distances, heights, and angles, and it's hard to see those relative distances in a flat 2D painting, so shadows don't always land as you'd expect. Keeping things more random gives it a more natural look.

OK, my next task is to add some more small twigs to make sure I don't have any leaves floating in mid air. Then I get to move on to the really fun part, detailing the deer! So look for these deer to have some fur texture in my next post. :)


Oct 30, 2015

Digital Deer Painting Maple Leaves Adjustment

As you saw in my previous post, I've been playing around ArtRage's Sticker Spray tool to paint leaves on my maple tree. I said one of the nice things about this tool is that, after you've sprayed your leaves on the tree, you can still go back and move, rotate, scale, and flip individual leaves to get a more natural look. Today I've discovered you can also go back and adjust the hue, saturation, and luminosity of individual leaves which helps even more in reducing a repetitive look in your tree.

Here's an example of a little problem area in my tree. We have a few leaves near each other that are too similar. I've circled the groups of similar leaves that I want to change.


You can tell with the orange leaves circled in blue that they are actual the same leaf image. While my maple leaves Sticker Spray variation settings do have some randomness to the color and rotation, sometimes that randomness just doesn't produce a noticeable difference. This is where we need to go in and tweak some of the leaves.

When I right-click on a leaf sticker in ArtRage I get a menu. Selecting the option for Sticker Tint brings up another panel with adjustment sliders for Hue, Luminance, and Saturation, as well as RGB (Red, Green, Blue).

My main gripe about this tool is there is no preview. So you don't know what your adjustments are going to do to your leaf until after you apply it by clicking OK. Then if you don't like the results you have to use Undo and try again. Fortunately, it didn't take too much fiddling to get a feel of what it does, so it wasn't too bad.

Here's another image after I did some quick moving, rotating, and adjusting of leaf colors. In this picture, if someone hadn't pointed it out to you, I think you'd be much less likely to notice some of the leaves were actually created from the same image. So with just a few quick tweaks we have things looking a bit more natural.


You can adjust things like opacity on individual stickers, which might be useful when painting things like rain drops, or balloons, or jellyfish. But I don't have much use for that here so we'll leave it at this for now.

Oct 29, 2015

Digital Deer and Maple Tree Painting - WIP6

Well, progress has been pretty slow on this painting, I admit. Not because it's a difficult painting, but because I have been spending a lot of time playing with ArtRage. This is only the second painting I've done that has ArtRage work in it so AR is still pretty new to me. My previous AR painting was my Cardinals Christmas Feast painting, but I only did the background for that in AR. All the rest was done in Photoshop. So I still have a lot to learn about AR.

One thing I played around with a lot in AR recently was the Sticker Spray brush. Here's some of the AR interface, and I've labeled some of the tools I'm using for those of you not familiar with AR.


So what is Sticker Spray, exactly? It's a tool that lets you apply multiple pre-made images to your painting very quickly. I was playing with this tool because I wanted to find a way to "paint" the maple leaves on the tree without having to paint each and every leaf individually. I had already spent a considerable amount of time painting these leaves by hand for my previous painting, Autumn Acquaintances, so I figured I might as well take advantage of that and reuse some of those leaves. After all, that's one of the advantages of digital painting!

 So, to use these leaves in an ArtRage Sticker Spray I had to the original leaves from my Photoshop image and lay them out in a grid as such, and save that image file out as a png to import into ArtRage's Sticker Sheets:


Here is the Sticker Sheets panel in ArtRage. I won't into detail on how to do this since there are lots of tutorials out there, and instructions on the AR site and in the manual, on how to do this. But as you can see, I've added my sheet of leaves there at the bottom.


That was actually the easy part. The hard part was playing with all those variables on that Spray Variations panel to get it to look right. I had to spend a lot of time tweaking the rotation and size and color to get it to look natural when I "sprayed" the leaves on the tree. Initially I was getting blue leaves, upside down leaves, and all sorts of weird things going on!

I think Photoshop has something similar where you can sort of spray on shapes with varying sizes and colors. But ArtRage lets you use pre-made full-color images rather than just shapes it adds colors to. Additionally, when you "spray" the shapes on a Photoshop layer they are stuck in place. In AR you can go back and move, scale, or rotate individual leaves after you have sprayed them down. This is important because the spray tool picks leaves from the Sticker Sheet at random and sometimes you end up with two of the same leaf right next to each other, which doesn't look very natural. So after I filled my tree with leaves I had to go in and move some individual leaves around to give it a more natural look.

So here's the painting with the leaves sprayed in and tweaked. I did them on two layers, one layer behind the tree trunks that have leaves that are a little smaller to make them look a little farther away, then a layer in the front with larger leaves.


So this is where I am now. I still have a lot more to do with the leaves. I need to go in and add shadows to give it a dappled sunshine look. And, of course, all the foreground work still needs to be done. So next will be doing some grass and fallen leaves on the ground. Grass can also be "sprayed" on with the Sticker Spray tool. Unfortunately, I don't have any digital clumps of grass to steal from my previous paintings so I'm going to have to make the grass from scratch. So that's what I'll be working on next. So look for grass in my next post!


Shop Art Supplies

Related Posts Plugin for WordPress, Blogger...