Showing posts with label art materials. Show all posts

Mar 18, 2014

Multimedia Artboard on Foamboard!

A while back I wrote a blog post about the advantages of Multimedia Artboard® and why I have been using it more and more often over the more traditional substrates of canvas and Gessobord for my oil paintings.

Here's that previous post: http://forestwildlifeart.blogspot.co.uk/2013/10/making-prints-from-oil-paintings.html

In that post I said the main drawback with Multimedia Artboard® is that it's brittle when unsupported and will snap like a twig, so you have to mount it on something. This can be a time consuming process of cutting the Artboard, then cutting something like foam board to mount it on, then carefully spreading the Yes! glue around evenly without getting any on your painting side, etc. Not a laugh-a-minute way to spend your morning before you can even start painting.

But, the purpose of this post is to share the news that Multimedia Artboard® is now available already mounted on Sintra® foam board for your convenience! I'm not sure how long it's been available but since it still says "New" on the website I'm guessing it's not been long. Good news for those of us who don't want to spend hours cutting and gluing and just want to get to painting!


Oct 1, 2013

Making Prints from Oil Paintings

Do you hope to make prints from your paintings that you can gift or sell? I think most artists like the idea of being able to make reproductions of their artwork. Take a photo, print it out. Sounds easy, right?

Uh, no. Not really. I won't even get into the headaches of trying to get a good photograph of an oil painting. That's a whole other topic for another blog post.

Today I'm going to talk about why the surface you paint on makes a difference when you decide to make prints from your image.

The other day I spent a good portion of the afternoon cutting Multimedia Artboard® and foam board and pasting them together. I usually paint with oils on one of three surface types, or substrates: canvas, Gessobord®, or Multimedia Artboard®. Recently I have decided Multimedia Artboard® is my substrate of choice.


Why?

Because I have decided to focus my art on licensing, creating art for reproductions on posters, prints, jigsaw puzzles, calendars, etc. This requires good, clean, "flat" digital images. By "flat" I mean little to no texture or glossy bumpiness shows up in the photo. Oil paints are glossy, canvas is bumpy. This is not a good combination for flat photos. But, much of this can be eliminated with proper use of correct light angles and polarizing filters.

So let's say you have your polarizing filters set up, and your light angles just right, so you minimize the glare from the oil's glossy surface, and you eliminate the texture from the canvas surface. There's still one more problem with canvas. It has holes.

By "holes" I don't mean literal holes. But the texture of canvas leaves paint holes on the surface, pockets in the surface's texture where the paint doesn't always get in. I recently finished a painting on canvas of a palomino horse. I spent a good deal of time in Photoshop fixing all those holes that show up as white spots in the photo. Here's an example of that.


See all those little white specks? (If you can't see them click the image for a larger view) Those aren't digital camera errors, or glare. They are from tiny pockets in the canvas' textured surface where the paint did not fill the holes. Interestingly, when you view the painting in real life you don't see those at all. The canvas texture and the paint's glossiness hide all that. But when you eliminate the texture and gloss from the image with the polarizing filters, these specks become glaringly obvious.

I could reduce this problem by working the paint into the canvas more. But that's hard to do because, as I said, you don't really see it in real life, so it's hard to know where it needs to be worked in. Also, working it in would require really pushing the paint around. I'd risk overworking the painting, blending too much, and losing those lovely painterly brush strokes.

So, the solution to this problem is to ditch the canvas and other rough surfaces for painting on. Gessobord® panels are one option. They are very smooth and eliminate the hole problem completely. My problem with them is that they are heavy, which can add considerably to shipping costs if you have to ship the originals somewhere. They are also prone to cracking, chipping, and breaking. Gessobord® is almost too smooth sometimes, too. The paint slips around sometimes and it can be hard to cover it with a nice opaque layer.

This is what brings me to Multimedia Artboard®. It has a little more texture than Gessobord® but not nearly as much as canvas. So you eliminate the hole problem you get with canvas but don't have the paint sliding all around the surface like you do with Gessobord. It's also very light weight, lighter than either Gessorbord® or canvas, so it's cheaper to ship. It's also very thin, so it's easy to stack, store, or travel with.

So why isn't everyone using it? Well, it does have one major drawback. It's very brittle by itself and will snap like a twig if unsupported so it must be mounted onto a support surface. This is why I mount it to foam board. Unfortunately, I don't think you can buy it already mounted so you have to spend some time doing it yourself. But once it's mounted to foam board it is thinner, lighter weight, and even less prone to damage than either canvas or Gessobord®. And it eliminates the paint hole problem. So, overall, though a little more work up front, I think it's worth the time and effort. Give it a try!

Update: Multimedia Artboard® is now available pre-mounted on foamboard!


Aug 6, 2013

Different Surfaces for Oil Paints

I recently updated my Horse Portraits web page and, in doing so, talked a little bit about the various painting surfaces I use for my oil paints. I thought I'd share those differences here, too.

I normally paint on one of three different painting surfaces, or substrates, with oils. Which one I use depends on a number of things. Some of it has to do with the look I want to achieve in the finished painting. Some of it has to do with what lighting conditions I expect the final piece to be displayed under. Some of it has to do with size and handling. 

The 3 substrates I use are:

• canvas
• multimedia board
• gesso board

Let's start with canvas, the traditional oil painting surface. Canvas gives the traditional rougher textured look that many people love in a painting. Canvas also leaves the oil in the paint, creating the glossy sheen of oils that many are familiar with. The downside to canvas is that finer detail is harder to achieve on this surface.

When I want a smoother, more detailed painting I often paint on multimedia board or gesso board.

Let's start with multimedia board. Multimedia board is much smoother than canvas but still has a slight texture. It is also much more absorbent than canvas, which means it will draw some of the oil out of the paint. This doesn't hurt the painting but it results in a less glossy, more matte finish when the painting dries. While some people love the glossiness of oils, that sheen can sometimes making viewing difficult because of glare. If you have a difficult lighting situation then you might want to go with multimedia board to reduce glare issues. Another advantage of multimedia board is it is very thin and light weight. Multimedia board is mounted on archival acid-free foam board to keep it strong yet still stay light weight. Because of this, it is not likely to be damaged when dropped and, if you want to ship it, costs will be lowest with this substrate.

Gesso board has the smoothest finish of the three substrates. It is less absorbent than multimedia board, so the oils will retain more of their glossiness, though not quite as much as canvas. It's a good choice if you want finer detail than canvas offers but still want to retain some of the glossiness. I only recommend gesso board for smaller paintings, however. Larger size boards get heavy and can increase shipping costs significantly. These large panels may also make your painting more susceptible to damage since they can crack or chip if dropped or bumped.

Below are images showing some close-up details of paintings on the different painting surfaces. Visit my website to see the full images.


Mar 4, 2013

Storing Water Mixable Oils the "Green" Way

I wrote a blog post a while back about how, when I used regular oil paints, I stored them in a container covered with water to prevent them from drying out. Now that I work with water mixable oils that obviously doesn't work. I now put them in plastic food storage containers with lids and store them in the freezer.

This only slows the drying, however. It doesn't stop it. So after several days I can no longer use those paints. They start to develop a dry film that gets chunks and bits in your painting. So I have to toss them out.

I haven't yet found a good method for cleaning dried paint out of plastic containers so I was just throwing the whole container out once or twice a week and getting new containers. This wasn't working all that well, though. Besides the fact that I can't eat enough turkey sandwiches to keep myself supplied with containers, the "green" side doesn't like the idea of throwing so many of these away. Because the plastic has been contaminated by paint I can no longer put the in the recycle bin. I don't like the idea of throwing so many plastic containers in the land fills so I wanted to think of a better, less wasteful, solution.

I know many artists line their palettes with paper so I decided to line my plastic container with paper. I didn't have any "proper" paper for such a thing so I looked around for what I had on hand. All I had on hand that I thought might work was parchment paper, normally used for baking. I cut a piece and put it in.


These worked out great! Now I can just throw out the liner and save the container for multiple uses. Much less wasteful this way. And, I don't have to eat so many turkey sandwiches! Not that I don't like turkey sandwiches but, really, with all that tryptophan, I'd be more likely to take a nap after lunch than get any painting done. :)

I don't just store my paints in these. I paint directly from them. That way I don't have to go through the hassle of transferring paint from palette to container each day. I realize some people may find my little lunch meat container too small to paint from, not giving them enough room for all their colors and mixing. But there are larger containers you can buy in the grocery store near the other food storage items like foil and plastic wrap. Stick with the cheap "disposable" containers instead of the more expensive Tupperware® and such. The cheap ones are just as good for this purpose and much less expensive.

Even if you need more space, you could still consider reusing your small lunch meat containers by using multiple containers for different color schemes. Put your sky colors in one, foliage colors in another, etc. Then you won't have your foliage colors drying out while you're only working on the sky.

NOTE: It's important to tape your liner to the container! I dropped mine a time or two and it could have been disastrous for the carpet had the liner fallen out and landed paint side down ... as Murphy's Law would have assured it did, just as a slice of bread always falls to the floor with the peanut butter side down! 

Anyway, that's my silly little method for storing water mixable paints. If you have other ideas I'd love to hear them. Please leave suggestions and tips in the comments section below.

Jul 17, 2012

Inexpensive Art Paint Tube Organizer

For a while now I've had my paint tubes in a box on my new workstation. I thought that would work fine since they're all right there within easy reach. But I soon realized it wasn't working well. Somehow, Murphy's Law I guess, the color I wanted always seemed to be hidden somewhere at the bottom of the heap, even though I'd just had it on top a short time ago. I realized I needed a paint tube organizer so I could see all my paint tube colors easily and find the one I want more quickly. Digging through the pile every time was getting frustrating. I needed a better solution.

I didn't have the table top space to just lay them all out side by side. I needed some sort of display stand. I looked around online and couldn't find anything that was really what I had in mind. I'd heard of artists using jewelry door hangers for their art tube but I had nothing to hang it on near my workspace, so that wouldn't really work. I wanted some sort of desk-top rack sort of thing where tubes could stand on end with their colors and labels clearly displayed but couldn't find anything like that on art supply websites.

One day making breakfast, when I was about to toss the empty egg carton into the recycle bin, the idea of it serving as a tube rack came to me. I flipped it over, looked at it, and wondered if cutting holes in the bottoms of the cups would work. Interestingly, it's the perfect size for your standard 40ml paint tube. Here's what I came up with:


It's just a simple cardboard egg cartoon, the top removed and the bottom half flipped upside down, with holes cut out of the egg cups. Now I can easily see the colors on the tube to find them quickly and keep them organized.

And, the best part is, it's free and easy to make!

Jul 20, 2011

How to store water mixable oils

How do you store the paints on your palette between painting sessions? When I used regular oil paints I used the method of putting them in a dish and submerging them in water. Obviously that doesn't work with water soluble oils.

Nowadays, I use plastic storage containers as my "palettes" and just seal the lid and toss them in the freezer. Since I like turkey sandwiches, I usually have a few of these floating around to recycle for my painting needs:


Of course, if you don't like turkey sandwiches (why don't you like turkey sandwiches???!), you can always buy containers like these:


It may seem tacky and cheap, but it actually works fairly well. Since I now only paint with 3 primaries and white I don't need a lot of palette space. But, if I do need more space, I can use a few separate containers, one for my blues and greens, another for reds and oranges, etc.

By actually putting paints on, and painting from, these containers, it saves a lot of time and headache not having to transfer them from a regular palette each time I clean up for the day. These small, light-weight containers are also very handy for traveling and doing plein air work.

By the way, you're not actually freezing the paint by putting it in the freezer (but the cold temperature slows down the evaporation rate, preserving the paint's moisture). The oil in the paint does not freeze at the temperature of the average household freezer. It needs to be several degrees colder than that to freeze. So, since the paint doesn't actually freeze, it doesn't hurt it and you don't have to wait for it to thaw. It's ready to paint with right out of the freezer. Here's an article that talks more about it if you want to know more about it:

Freezing Oil Paint

How do you usually store your paints? And what are some of the crazy ways you've tried that may, or may not have, worked?

Jul 9, 2011

Water Mixable Oil Paints


I recently read a blog about a way to clean up oil paints without using harmful solvents. While the advice was sound, my first thought was, "Why not just use water mixable oils and avoid solvents altogether?" But then I remembered my recent visit to a local art supply store to buy some water mixables. They didn't have any. I asked the clerk why they didn't carry them. She said they didn't carry them because they just don't sell.

Hmm. Why not? Why aren't artist buying these? In fact, why aren't artists demanding them? Why would anyone want to subject themselves to toxic, smelly chemical solvents if they don't have to? I started asking around and soon discovered that most artists who had ever tried water mixable oils had tried them around the time they were first introduced back in 1992 by Grumbacher as MAX water soluble oils. Artists were quickly disappointed and frustrated by their gummy, tacky properties. I myself tried them and was seriously disappointed, promptly returning to my traditional oils, stinky solvents and all.

Nothing against Grumbacher, mind you. They make fine products. It was just the technology of the time. There were no companies who had got it quite right yet back then.

But years passed and things changed. Water mixable oils have come a LONG way since 1992.

Seriously, if you have not tried them in the last several years you really should give them a second chance. I switched from regular oils to water mixables several years ago and I haven't looked back. There is almost no difference between the look and feel of regular oils and water mixables these days. The only thing you give up is the toxic solvent!

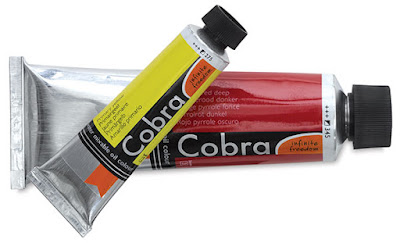
I've tried a few different brands. I quickly fell in love with Van Gogh H2O water mixables because of their soft, creamy texture. I paint fairly detailed and soft oils work better for me. I can paint fine detail without having to thin them much, if at all. Van Gogh H2O water mixable oils were produced by Royal Talens and were considered "student grade" paints. I, however, was never disappointed in them. Nevertheless, Royal Talens decided to discontinue them and replace them with "artist grade" Cobra water mixable oils. I recently replaced some of my dwindling H2O paints with Cobra and I am just has happy as ever with them. They are wonderful! They have the same lovely creamy texture and beautifully rich colors as their H2O paints but now I know they are higher grade and that's just fine by me.

I have also tried Winsor Newton's Artisan Water Mixable Oil Colours. It's a good product but a little too thick and stiff for me. It's harder to do the fine detail with a thicker paint.

I've also tried Holbein Duo water mixable oils. This is also a good product and I use them with my Cobras sometimes. Their "thickness" is somewhere in between Artisan and Cobra.

I personally prefer Cobra among the 3, not because the others are not good products, but because the smooth creamy texture of Cobra works well for the sort of fine detail I like to do.

They are all very good paints, much better then their 1990-something predecessors. Which brand you'd prefer depends on how you paint. If you paint impasto then Artisan is probably your best choice. If you paint fine detail, like me, give Cobra a try. If you're somewhere in the middle then Holbein Duos may be your best option.

Whatever your style of painting, please take the time to give water mixable oils another chance. They have improved a LOT since they were first introduced. If you're like me, you'll be so happy to be away from smelly, toxic solvents and know you're doing a good thing for your health by switching!

Comment below with your thoughts. Have you ever tried water mixables? How long ago? Have you tried them recently? How do you paint (detail, impasto)? Which brands do you like best?

Shop Art Supplies

Related Posts Plugin for WordPress, Blogger...